This is my initial list of steps to build the table saw. I will add pictures and notes as I progress.
- Attach finished Makita saw 4″ dust port.
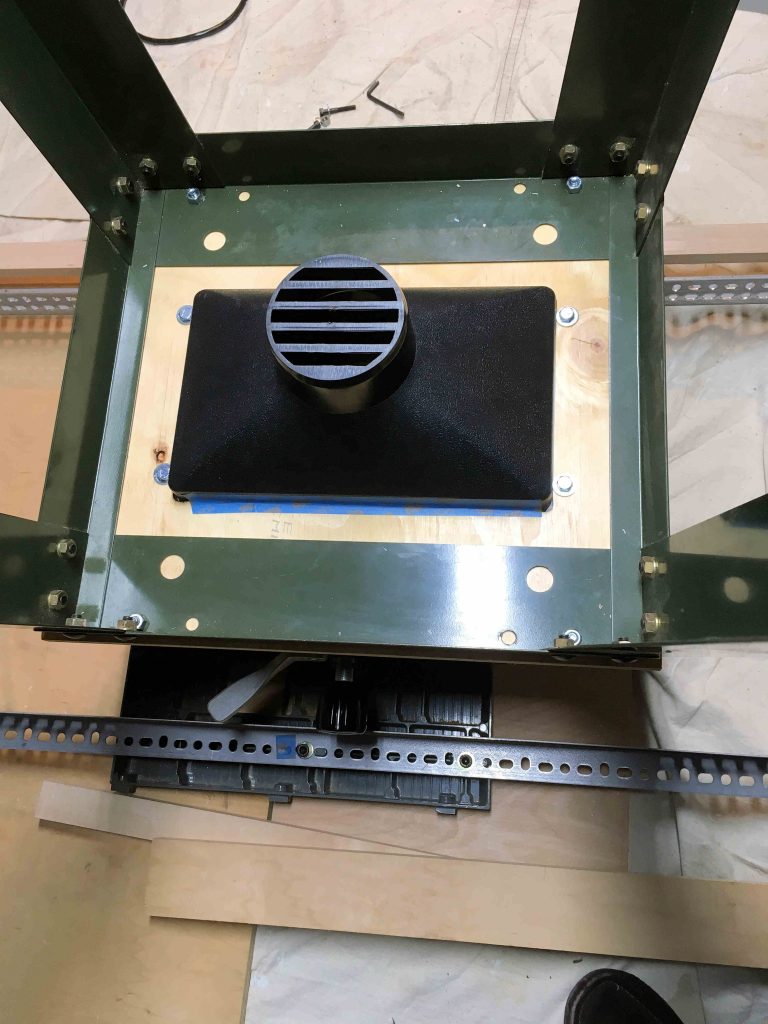
a. Using routing template held secure with double stick tape cut dust funnel hole.
Sand, urethane and assemble. Lube the table saw before sealing it closed.
b. Practice with template bushings. Use at test board to practice cutting the router plate hole with a template bushing.
c. Nice to do: Attach the Freud router to a new woodpecker phenolic plate.- Notes: My template bushings are too small to use for the Router table plate template. I want a 1/2 ledge for the plate, but the bushings are not close to being large enough. The double stick tape worked well to hold down the template to cut the table saw port. I think the tape will help with the jig for routing the table top hole for the router plate
- Move the angle iron backbones to the 27/45 location. Add horizontal spacers (19 3/8″ ?) to ensure they are parallel.
- Notes
- Attach wood edges for JoinTech rails to the Makita saw.
Build the maple wood edge rails. Use the workbench to get them flat and straight. Glue and screw.
Predrill screw holes each foot for attaching to table top.
Add three countersunk (due to rails) holes for attachment to the Makita. - Determine the size of the table top: 72 1/4 x 27 1/2????
Should it be longer than 72″ say 72 1/4 to allow trimming and endplates to be fitted tight?
Shorter than the rails is a problem. An extra 1/8″ on each side is not an issue. - Flip table right side up. Level the rails to the Makita top.
Attach the dust funnel to the Makita.
Add eight small vertical spacers to hold table level. Measure height with calipers. - Buy and install plywood table top.
Check the length against that of the side rails.
Cut the side rails to length.
Fashion some temporary endplates with legs and level?
Level and connect maple side rails to the table top.
Edge trim the side rails.
Install the JoinTech rail clips, check for clearance to cut t-tracks.
Remove JoinTech rails and epoxy coat the wood rails filling screw holes for better grip.
Sand and urethane the table top.
Add the permanent vertical spacers. - Install JoinTech System.
Install the JoinTech rails.
Add endplates with permanent legs. Level again.
Install the JoinTech SawTrain and fence. - Using the JoinTech fence for alignment of router and miter tracks.
Raise the Makita saw blade and align JoinTech fence to be parallel.
Decide where to place the Router plate and dust box, draw outline on table.
Draw lines for the t-track miter slots using fence. - Cut the router plate hole in table and miter tracks.
Cut the router plate hole. Epoxy edges and finish.
Cut the t-track slots using plunge router and JoinTech fence if rails permit. - Build the router dust box with phenolic plywood.
Need a cable grommet for the router cable exit from box.
Need to cut hole for dust funnel, add a door and attach table.
Attach to dust portal to dust collection system, cut a new PVC extension as needed. - Finishing table top.
Remove the fence and do a final finish on the table top.
Reassemble and test dust collection.
Leave a Reply